My latest project almost had it in for me. And my kitchen table.
When I started this project I naively thought that I'd simply whip up a few flowers, glue them to the shade and ta-da!!! a gorgeous and effortless new lampshade.
Gorgeous...Yes.
Effortless?...Not so much.
But we'll save the drama for later.
Sooooo, a while back I refurbished a couple of
ebay lamps.
I ended up in love with one of them and it's now on my nightstand, but the other one needed some improvements.
For starters, it was boring. And the white shade clashing with the creamy spray paint bugged me. It's like when my hubby wears black dress shoes with navy or brown socks. I start twitching.
So I decided to change everything.
I bought three yards of white muslin and a new box of 24 glue sticks for my glue gun and got to work.
This is how my table looked for days...
And days...
And days...
My table became a barren wasteland of ripped muslin and dried glue strings everywhere.
You see, genius that I am decided to cover the entire shade with the rosettes. Not just a small part of it. So after many days of twirling and blistered fingers I had this:
Not very promising. But I stuck it out. For two weeks.
The problem was, after twirling a dozen or so rosettes, my fingers would cramp and start to look like the hands of an 85-year old, so I could only do so many a day.
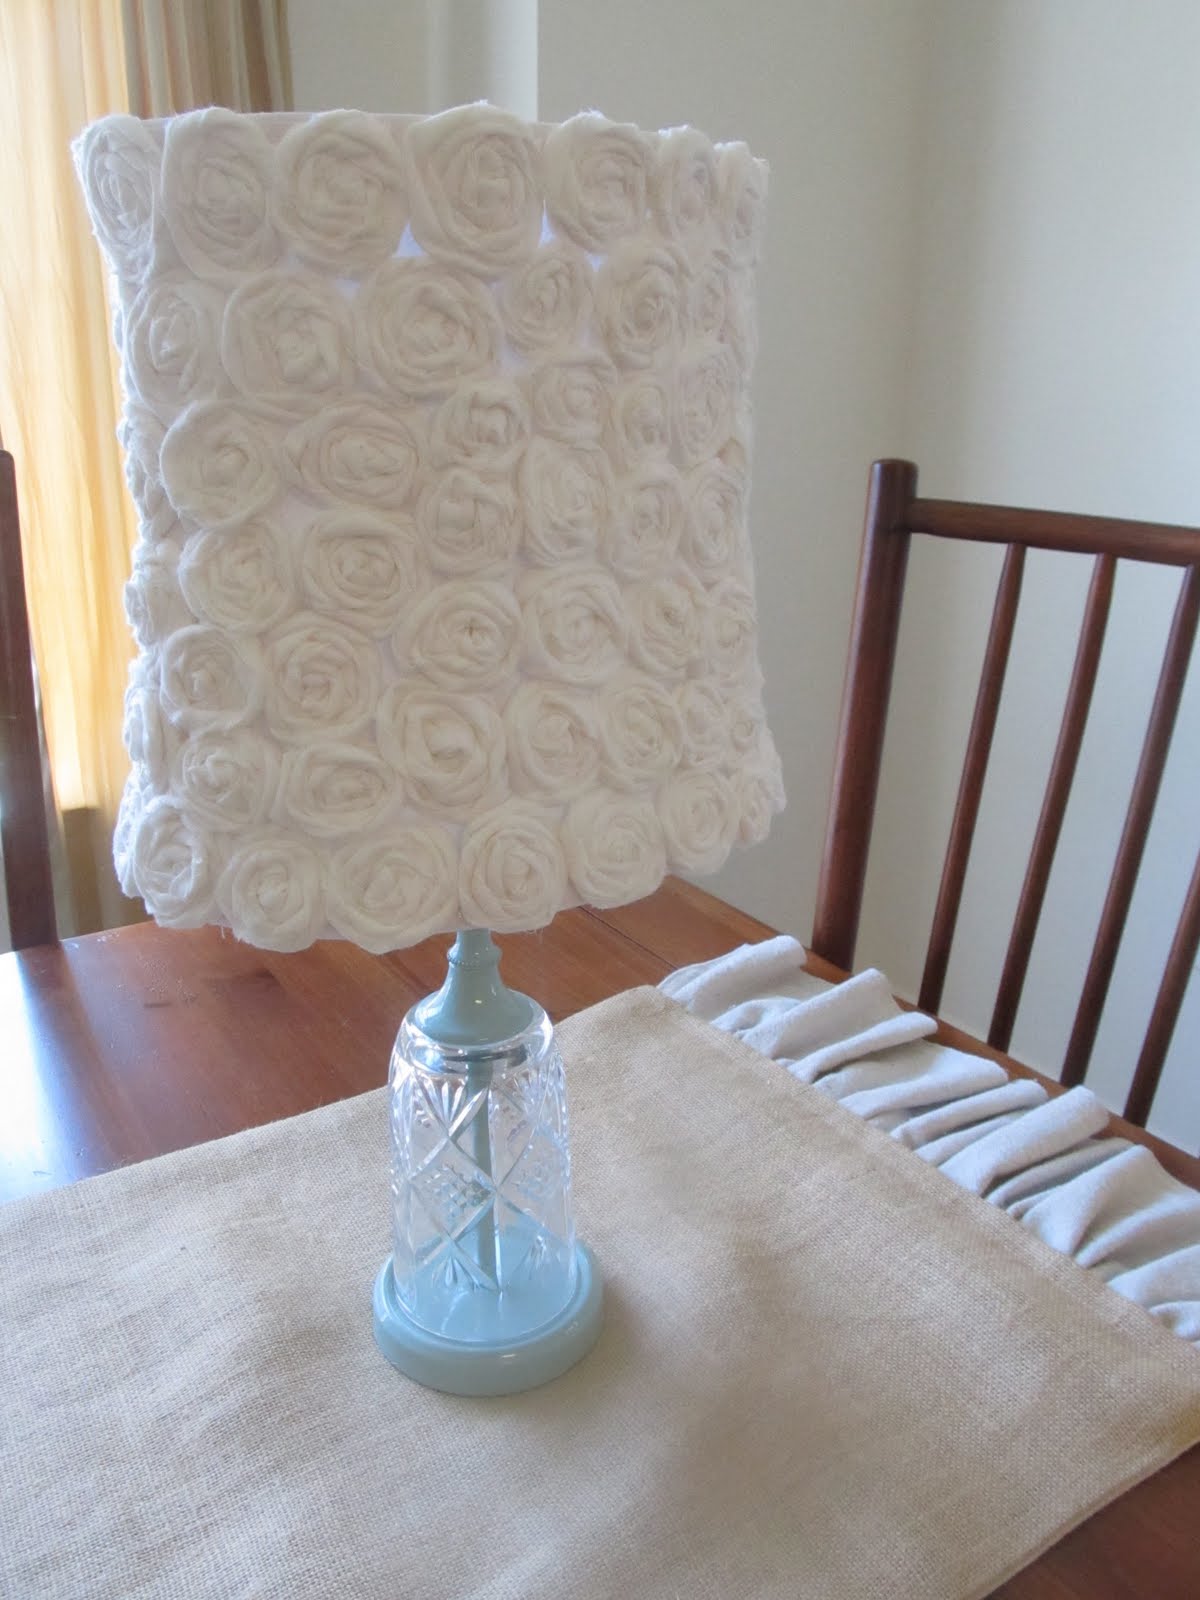
But I had seen a shade covered in white fabric rosettes at Homegoods and I was determined to copy it, no matter how blistered and distorted my hands became. So I hung in there for another week (yes, it took me THREE WEEKS to finish what should have been an easy project) and FINALLY finished what will now be known as 'the devil's lampshade.'
I decided to spray paint the lamp a pretty aqua. I think it will be darling in the girls' room someday when they have their own room.
I ended up using all three yards of muslin and almost the entire box of glue sticks for this one project. But I actually think it was worth it. I love the end result!
I'm still not completely happy with this combination of lamp and shade. I just won a few beautiful milk glass lamps off of ebay so I'm sure I'll find a good match among them. Once my fingers heal, of course.
Linking to:


I love it!! thanks so much for stopping by.
ReplyDeleteKarin
Aw, this is so pretty. I bet it looks gorgeous with the light shining through it!
ReplyDeleteBy the way, I am hosting my first link party, and would love to have you link this up to it--
http://southernlovely.blogspot.com/2011/08/show-share-1.html
Your lampshade is stunning. I agree, it needs a more substantial lamp base. Thanks for visiting me. I'm your newest follower.
ReplyDeleteSo beautiful!! TFS.
ReplyDeleteThat lampshade turned out so pretty. Thanks for the great tutorial too.
ReplyDeleteI am your newest follower and will be back!
I host a Bunny Hop Party every Wednesday for newbie bloggers, and I would like to invite you. The linky is open until Sunday, but don't wait too long ;)
xoxo Bunny Jean
Bunny Jean's Decor and More (my main blog)
This is simply beautiful. I'd love to have a lamp like this! I highlighted this at somedaycrafts.blogspot.com. Grab my "featured' button.
ReplyDeleteSaw your project highlighted on Someday Crafts - I love it! Very pretty and a great idea! Also congrats on being highlighted.
ReplyDeleteI really love the way that turned out! So unique! I bet it did take a lot of time to do it though!
ReplyDeleteToo cute, the lamp became transformed. I am your newest follower.
ReplyDeleteThe lamp is too cute. I am now your newest follower!
ReplyDeleteLove the lampshade, what a great idea. How long did it take you to make all the flowers?
ReplyDeleteHi Amanda,
ReplyDeleteThanks for following my blog, I want to follow yours, but I don't see where to google connect? Also don't see a contact you page.
Let me know how to follow.
That lampshade looks great;)
ReplyDeleteThank you for your lovely comment on my table.
Lovely greetings...
http://pudel-design.blogspot.com/
love this.
ReplyDeleteitsjustcalledspicy.blogspot.com
I LOVE IT! I'm glad to see I'm not the only one crazy enough to do rosette projects!
ReplyDeleteYou have a LOT of patience! But it was all worth it, because your shade is beautiful!
ReplyDeletecatching you this week,
gail
Oh! I'd like to try this! Can you tell me how to make the rosettes? I have a lamp and a shade....the gluesticks and white muslin! Help me out! andthanksforthewarningtoo....heehee
ReplyDeleteI'm your newest follower! Come say HI when you can.
LURVE that lampshade!
Oh,so worth all your hard work! How romantic. I'm going to pin this under my daughter's room ideas ... stopping by from Not Just A Housewife ...
ReplyDelete